CodeScene CLI tool
What You Can Do With The CLI
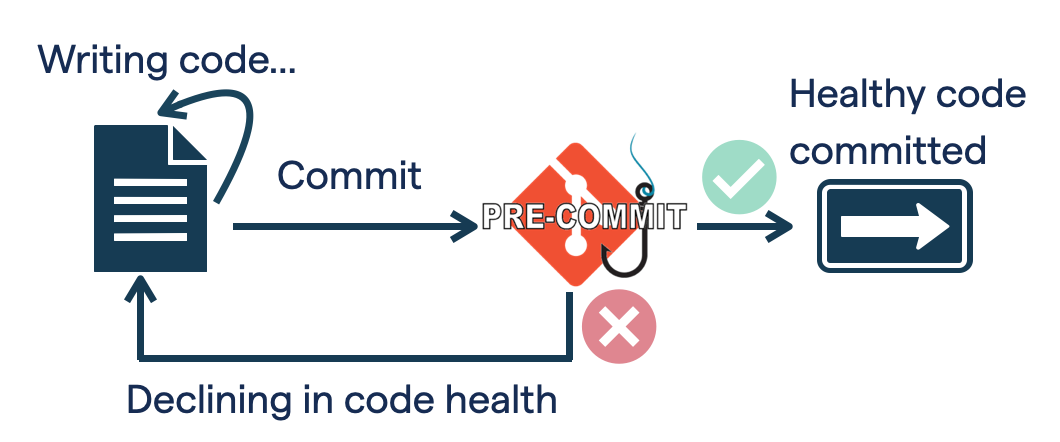
The CodeScene CLI helps you run CodeScene analyses where developers work: locally, in pre-commit/push hooks, and in CI.
What you can do with the CLI:
Review non-committed or staged changes before opening a PR.
Compare branches with delta analysis to see code health impact.
Use pre-commit and pre-push hooks to catch issues early.
Integrate with editors and CI/CD pipelines.
Command Guides And Reference
Here is a quick guide to the core workflows:
cs deltafor change-based analysis between working tree, commits, or branches.cs reviewandcs checkfor file-focused code health feedback.cs rules-configandcs check-rulesfor custom code health rule tuning.
Install The CLI
Installation
Linux, macOS and Windows (if WSL)
The install script will download the binary, move it to ~/.local/bin and make it executable. If ~/.local/bin is not in the user’s PATH, it will be added.
It works if your shell is one of: bash, zsh or fish
curl https://downloads.codescene.io/enterprise/cli/install-cs-tool.sh | sh
Windows (powershell)
The powershell script downloads the windows binary, moves it to $env:USERPROFILE\AppData\Local\Programs\CodeScene and makes it executable.
Invoke-WebRequest -Uri 'https://downloads.codescene.io/enterprise/cli/install-cs-tool.ps1' -OutFile install-cs-tool.ps1
.\install-cs-tool.ps1
Note, on non-server editions of Windows, the script execution policy is set to Restricted by default, and script execution is disabled. It can be enabled with:
Set-ExecutionPolicy RemoteSigned
This allows for the execution of trusted scripts downloaded from the internet, and all local scripts. In our case the script is considered a local file.
Manual installation
The binaries are also available for manual installation. Just download the binary for you platform and make it executable.
Platform specific notes
MacOS binaries are not signed, thus you have to manually move them out of quarantine using
xattr -dr com.apple.quarantine <binary>.Windows users might have to set the script execution policy manually as mentioned above:
Set-ExecutionPolicy RemoteSigned
Updating
To update the tool, just run the install script again or re-do the manual installation.
You can check the version of the installed tool via cs version, which will print out the build date and SHA for the installed version.
Activate The CLI
The CLI tool requires an access token for licensing. You need to have your CodeScene administrator set up a token on the projects configuration page . Then set your environment variables as follows:
export CS_ACCESS_TOKEN=<your-access-token>
Or in Windows PowerShell:
$env:CS_ACCESS_TOKEN = '<your-access-token>'
Select An Account For OAuth Login
When using browser-based OAuth login, set CS_ACCOUNT_ID to a positive account ID before running cs auth login to select that Cloud account:
CS_ACCOUNT_ID=123 cs auth login
The signed-in user must be a member of the requested account. OAuth credentials are stored separately for each selected account. This variable does not affect CS_ACCESS_TOKEN authentication.
Windows setup options
PowerShell:
$env:CS_ACCESS_TOKEN = '<your-access-token>'
Windows Command Prompt (temporary, current session):
SET CS_ACCESS_TOKEN=<your-access-token>
Windows Command Prompt (persistent):
SETX CS_ACCESS_TOKEN=<your-access-token>
Note: SETX changes take effect in newly opened terminals.
You can also set variables through System Properties:
Right-click “This PC” or “My Computer”
Click “Properties”
Click “Advanced system settings”
Click “Environment Variables”
Shortcut:
Press
Windows + RType
sysdm.cplGo to the “Advanced” tab
Click “Environment Variables”